This will be my first Malifaux/Frostgrave crossover terrain piece.
This piece will be used for the Scenario: The Well of Dreams and Sorrows
This piece will be used for the Scenario: The Well of Dreams and Sorrows
Small lid -- the lids from mini cups are perfect. Diamond sells a bagof 50 cups with lids are the greatest for various projects. If you can’t find a bag of mini cups, the local take-out or salad bar has them. Order a salad with dressing on the side and you will have what you need after a healthy lunch! (Make sure you wash the cup and lid well if repurposing)
Wax paper -- Protects your work surface and allows your glue to dry evenly. I like the results much better than newspaper, but reusing the flyers they endless stuff in your mailbox are an ok substitute.
Small stones – I bought a bag of gravel from the local hardware store. The gravel is various sizes, but for this project I pick out stones that are big enough to fit 3-4 onto a penny. This creates a scale where it seems feasible the stones were hand carried to site and manually assembled. This well is going to look ancient, but can also be used in settings where it looks like the denizens did the best they could with the material at hand.
Wood Glue – Flexible and strong. A little more expensive than White glue, but a bit cheaper than Hot glue and I prefer than either when it comes to gravel.
Paint -- I am picturing this being used for Frostgrave mostly, so I imagine grey stone. Inexpensive, Craft acrylic paints in Black, White and Grey.
Spackle – This is the mortar. Get a tub of spackling paste from your hardware store, you will use a lot of it in your coming terrain projects (great for hills, cliffs, cabins, water features and basing, too!)
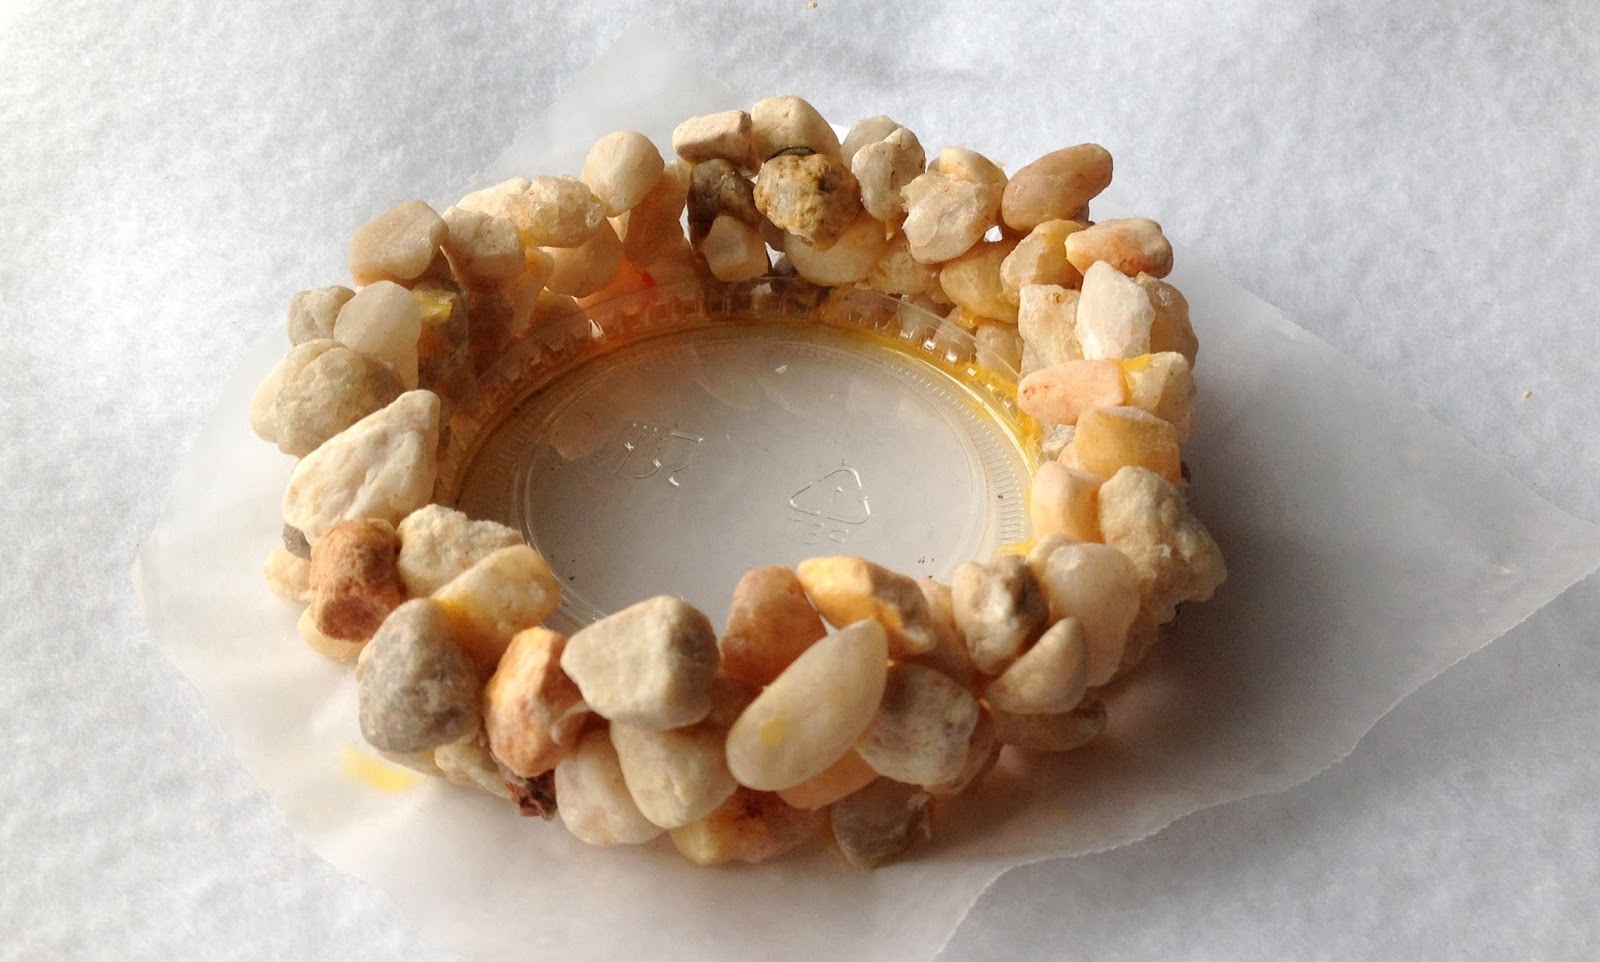
 1. Find a lid that is slightly smaller than you want your finished product. Cut a piece of wax paper that will be slightly larger than your finished product. Place the lid centered on the wax paper, with the inside facing up. The lid is not only going to serve as the guide for your well’s circumference, but it also holds your “water”.
2. Squeeze your glue (I recommend wood glue over the other options) onto the wax paper around the outer edge of the lid. This glue will not only connect the stones, but it will also bond the stones to the lids.
 3. Start placing your stones around the base, flush against the outside of the lid and to one another. Do not worry about spacing them, there will be enough gaps and space due to irregular shape and roundness of the gravel. I create an irregular base, randomly alternating between large and medium –sized gravel pieces. You can create a more uniformed look by just using medium -, or even two small, –sized gravel pieces deep, but I like the irregular profile and it allows the second and third level of stones to settle in interesting ways.
4. Once you get the initial base surrounded with gravel so it looks how you want it, let the glue set.

This is what my well looks like after the final level. I went with 3 levels. For 28-32 mm scale, I think anything higher seems impractical from the fluff of citizens getting water and also from a terrain perspective of giving cover, but not blocking LOS.
Next entry will discuss the addition of mortar and paint.
Let me know if I skipped anything, you have any questions, or was unclear about a step.
Have fun building your miniature world!
No comments:
Post a Comment